Users
By default within ETINU, there is one super-administrator available when a site is created who can do all everything below. This super-administrator can then create more super-administrators, administrators (to give them certain privileges throughout a site) or give special privileges to registered users.
Every ETINU web site allows visitors to register. All they need to do is fill in a simple form that asks for their name and email address. You, as owner, receive an email that contains a link. When you select the link, a web page is displayed with their details and the options for you to approve (or reject) their registration.
Once they are registered, you can send a mailshot at any time informing all your registered users of improvements to your web site, special offers or news that you think may be of interest to them.
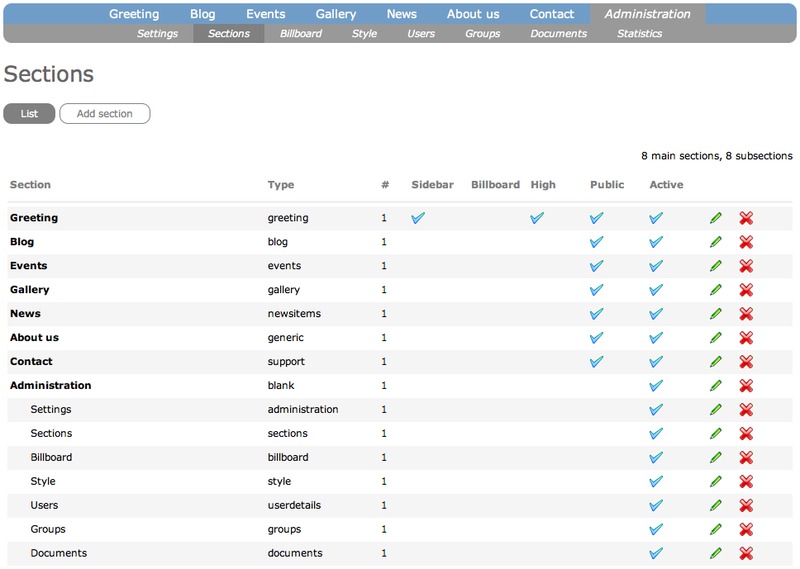
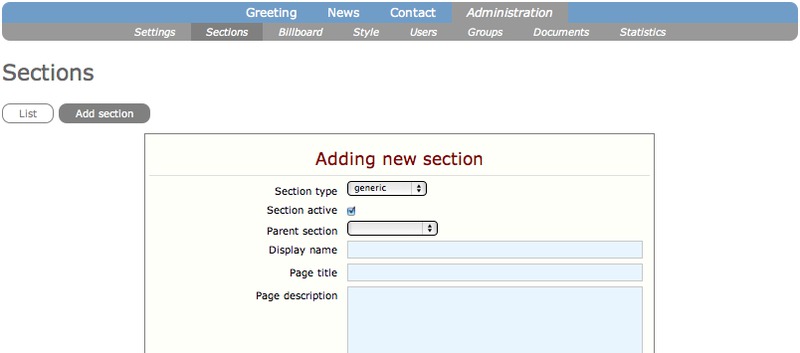
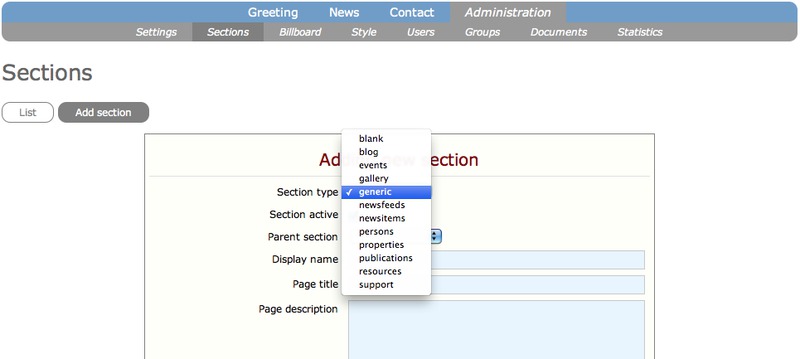
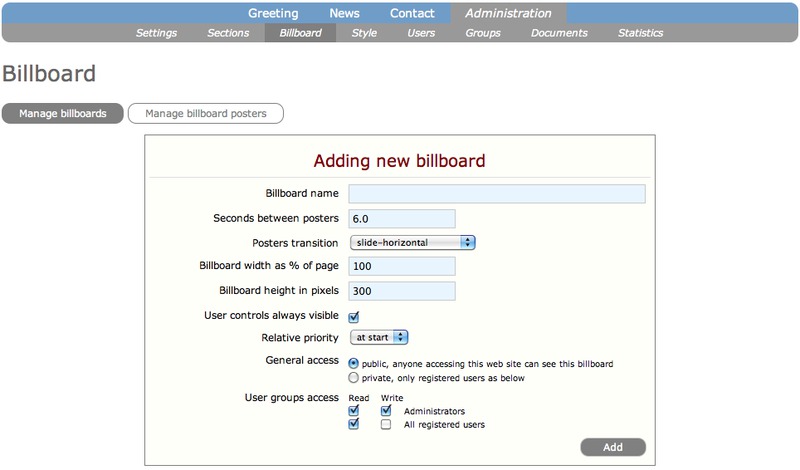
Below describes the three options available to you in Users.
List of users
This option displays all the users who have registered. If the site has just been set up, the super-administrator is the only one listed.

Each row contains the user's: First name, Last name, Email address, Telephone (if supplied), Password (not displayed if that user is the super-administrator, A (a tick is displayed if the user is an administrator), SA (a tick is displayed if the user is a super-administrator) and Added (the date the user was approved), a pencil icon (to edit the user's details, see online form below) and a cross icon (for deleting the user).

Mailshot
When you select Mailshot (available in Users), the form below is displayed.

Add a Message subject (make sure it is meaningful, relates to the message content and will encourage your audience to read your message), the content of the message in Message content and select the group or groups that you want to send the message to by selecting the appropriate checkbox. To send to everyone, select the checkbox for All registered users.
When you are happy with the message subject and content, select Send. The page will refresh to show you the message and the list of email addresses that the message has been sent to.
Note: If you have a document you want to send, you must first upload the document into Documents (in the Administration section). Once the document is uploaded, place the cursor over the filename, use the mouse to right-click and a mini-menu will appear. Select the option Copy Link and it will copy the web address into the clipboard. Now paste the link into the Message subject. More information in ETINU's Blog.
If you know your registered users, you can place a number of users into a group (see Groups). By default, super administrators, administrators and registered users are listed under Recipient groups. When you create other groups they will also be listed there and you can select the appropriate checkbox to mail a group separately.
Registrations
To save you going through your emails, this option displays those users who have registered but have not yet been approved.

To approve or reject the user, select the pencil icon for that user and the form is displayed.

To approve the user, select the Approve button and an alert window is displayed to check this is the option you wanted to choose. Select OK and the user is approved. They will receive their password via email and be invited to login to your site through the login option.

 A news feed provides users with frequently updated content. People use a web-based aggregator like Google Reader to allow them to subscribe to a news feed and read the news. Three options are available to display the news RSS icon: None so that no icon is displayed; select Banner to display the news RSS icon in the banner; select Footer to display it in the footer
 There are three options for display the twitter icon: None so that no twitter icon is displayed; select Banner to display the twitter icon in the banner; select Footer to display it in the footer